Sunday, October 24, 2010
Thursday, October 21, 2010
Configuring Disk Quotas in Windows 2003
| What disk quotas are, when they should be used, and how to configure them in Windows 2003. |
Looking for a means to manage the amount of network storage space users receive? Disk Quotas are the way to go. In this article we will look at what disk quotas are, when they should be used, and how to configure them in Windows 2003.
About Disk Quotas
Unfortunately, in Windows NT Disk Quotas didn’t exist, which was much to the disappointment of Windows Administrators. Along came Windows 2000 and with the introduction of Disk Quotas it meant Administrators had the ability to track and control user disk usage. The only problem was that they didn’t really have a sufficient way of managing disk quotas. Scripting, reporting and remote usage methods were somewhat limited and ambiguous. Windows 2003 offers better all round functionality and easier enterprise-wide disk quota manageability.
Disk quotas are used in conjunction with NTFS, Group Policy and Active Directory technology. NTFS is the file system on which disk quotas can be set, Group Policy is what is used to set disk quotas on a specific set of users and computers, and Active Directory is used to gather a list of users to which the disk quota group policy will be set. It is important to note that disk quotas can only be used with NTFS; setting them up on FAT or FAT32 drives is not possible.
Disk quotas are configured on a per volume basis and cannot be set on a file or folder level. Each volume would have its individual settings which do not affect any other volumes. You may have a single disk partitioned into two volumes (drives C and D for example) with each having their own quota settings. Disk quotas can also be configured on a per user basis and different groups of users can have different limits set. Administrators are the only ones to whom a disk quota does not apply; by default there are no limits for an Administrator.
There are numerous reasons you may wish to make use of disk quotas. Based on the requirements of your organization you might choose to configure disk quotas if you have a restricted amount of disk space on a specific server, a limited number of servers, or perhaps the need to monitor user disk space usage without actually enforcing a quota. You might be wondering why you’d want to just monitor user disk space usage. Well, let’s say you have a fileserver set up with multiple users in your organization using it everyday to store temporary files. As time goes by and perhaps people forget to delete the files from the server, the amount of available disk space will continue to decrease. If nothing is done about it then users will be denied the right to add more files on the server (until some old files are removed). By monitoring user disk space usage with Microsoft’s disk quotas, you can be notified of when space is running out and then increase the allocated space on the server accordingly or notify your users that they need to delete their files from the server. Additionally, setting a quota warning level will allow for a system event log to be written for your review.
Setting a Group Policy
The most practical means of configuring disk quotas on a large scale would be through a domain-level group policy. This will configure the settings automatically on any of the volumes you wish to have disk quotas enabled, saving you the need to have to configure each volume independently.
Open the Group Policy Object Editor (gpedit.msc) and navigate to Computer Configuration > Administrative Templates > System > Disk Quotas. On the right hand pane you will see a list of policies that can be applied. Double click the “Default Quota Limit and Warning Level Properties” setting.

Figure 1: The Default Quota Limit and Warning Level Properties Dialog
The default quota limit is the maximum amount of space assigned per default quota, whereas the warning level is the amount of space at which a warning is triggered. Normally 90-95% of the total value is a good limit to set as a warning.
Now configure any other settings you wish to be applied by selecting them from the right hand pane. To have your changes applied immediately you can enable the “Disk Quota Policy Processing” policy and choose “Process Even If The Group Policy Objects Have Not Changed” from Administrative Templates > System > Group Policy.

Figure 2: The Disk Quota Policy Processing Dialog
You may also want to manually force a group policy update using the gpupdate utility. Simply go to Start > Run and type gpupdate followed by the return key. This will refresh both the computer and user policies.
Whatever changes you make in the group policy will be reflected on the Quota properties tab of each volume you wish to configure in your domain. The options will appear grayed out and non-editable.
Configuring Disk Quotas and Disk Quota Entries
Using the Computer Management console, you can configure disk quotas for a local or remote volume from a central location. To open Computer Management, you have three choices; either right click My Computer and select Manage, type compmgmt.msc in the Run bar or select Computer Management from the Administrative Tools folder.
Select which computer you wish to manage from the root node. To select a remote machine right click the “Computer Management” node, select “Connect to another computer…” and choose the computer you wish to manage. Now, navigate to Storage > Disk Management and select the volume you want to configure from the right hand pane and open the properties dialog. Click the Quota tab and enable the options you want to be enforced.

Figure 3: The Disk Quota Properties Dialog
The traffic lights icon at the top indicate the status of the disk quota; red means quotas are disabled, orange signifies a changeover is taking place (while it rebuilds the disk information), and green means disk quotas are enabled. A textual representation of the status is shown on the right of the image.
Check “Deny disk space to users exceeding quota limit” to have Windows restrict users from adding more data to their allocated disk space when the quota limit has been reached. Users will be unable to add more data until some space is freed up.
As you can see from Figure 3 above, the quota limit for new users is greyed out. This is because we have already set it from the group policy, which overrides any customizable settings on the quota tab of a volume. In this case we have limited the user’s disk space to 500MB and set a warning level to 450MB.
You may choose not to limit disk usage and just enable quotas to track disk space usage on a per volume basis by leaving the “Deny disk space to users exceeding quota limit” checkbox unchecked and logging a warning when a user exceeds the warning level defined as part of the quota limit. Whenever a user exceeds this limit a Warning event log will be written to the Application Event Log and shown in the Event Viewer.

Figure 4: A warning event log for disk quotas
As per http://support.microsoft.com/kb/915182 there is a known issue in the pre service pack version of Windows 2003 in that the Warning event log is incorrectly shown as an Information log in Event Viewer. In the Quota Entries application however, it is correctly displayed as a Warning.
When you press the Apply button on the Disk Quota Properties Dialog you are notified that the volume will be rescanned to update the statistics and that this operation may take several minutes. Simply press OK to continue and have disk quotas enabled on that volume.
Quota Entries
Click the Quota Entries button on the Disk Quota Properties Dialog to view a list of individual disk quota entries. From this section you can create, delete and manage quota entries for specific users or groups. If a user requires more space than others then you can set this from here.
Go to Quota > New Quota Entry and the Active Directory User Picker will appear. Choose a user from Active Directory and press OK. You will be given the option to limit disk space and set a warning level or not limit disk usage at all.

Figure 5: Adding a new quota entry
Once you have chosen your preferred settings, press OK and the user will be added to the list. You can monitor a user’s disk usage by looking at the properties of each of the columns. ‘Status’ indicates whether the user is within their limit, if a warning has been logged or if the limit has been exceeded; the icon will change accordingly.

Figure 6: Viewing a list of Quota Entries
Conclusion
This article has given you an overview of Disk Quotas in Windows 2003. We’ve looked at why they would be used and how to configure them.Some Administrators will find they won’t need to utilize Disk Quotas, but for those who do I have no doubt that you will find them very useful indeed.
Using NSLOOKUP for DNS Server diagnosis

| The DNS protocol has been around for decades and is a stable and reliable protocol. Even so, DNS does occasionally have problems. PING is a great tool for DNS server diagnosis, and I tend to use it quite frequently myself. However, sometimes PING just doesn’t give you enough information about the problem at hand. When you need more information about a DNS problem than what PING provides you with, you can always turn to the NSLOOKUP command. In this article, I will show you how to use NSLOOKUP. | |
The DNS protocol has been around for decades and is a stable and reliable protocol. Even so, DNS does occasionally have problems. These problems might stem from a loss of connectivity, an invalid DNS record, or a number of other issues. When a DNS server doesn’t behave in the way that it is expected to, many people turn to the PING command for help. PING is a great tool for DNS server diagnosis, and I tend to use it quite frequently myself. However, sometimes PING just doesn’t give you enough information about the problem at hand. When you need more information about a DNS problem than what PING provides you with, you can always turn to the NSLOOKUP command. NSLOOKUP is a built in DNS diagnostic utility that’s available to both Windows and UNIX Administrators. In this article, I will show you how to use NSLOOKUP.
The Basics
NSLOOKUP has a fairly rich syntax and can be a bit confusing for those who have not worked with DNS a great deal. Therefore, I want to start out by showing you some of the basics. Although NSLOOKUP exists in both UNIX and Windows, there are some differences in the way that it behaves in the two operating systems. For the purposes of this article, I will be using the Windows version.
The first thing that you need to understand about NSLOOKUP is that when you use the NSLOOKUP command, it assumes that you are querying a local domain on your private network. You can query an external domain, but NSLOOKUP will try to search for the domain internally first. For example, the brienposey.com domain is external to my network. If I perform an NSLOOKUP against brienposey.com, NSLOOKUP returns the information that’s shown in Figure A.
Figure A: This is what happens when NSLOOKUP queries an external domain

If you look at the figure, you will see that there are non existent domain error messages for the IP addresses 147.100.100.34 and 147.100.100.5. These are the addresses of my internal DNS servers. Below this information however is the non authoritative answer. This means that my DNS server queried an external DNS server in an effort to resolve the IP address associated with the brienposey.com domain.
Now, let’s take a look at what happens when you query an internal domain. One of the local domains on my private network is production.com. If I perform an NSLOOKUP against production.com, I get the results shown in Figure B.
Figure B: This is what it looks like when I query an internal domain

If you look at the top portion of this screen, you will notice that I’m getting the exact same non-existent domain error messages as I got when I queried an external domain. At first, this may seem puzzling. The reason why I got this error message was because I performed an NSLOOKUP outside of the NSLOOKUP shell. I will talk more about the NSLOOKUP shell in the next section. For now though, you need to know that you can enter the NSLOOKUP command by itself. When you do, you will see the familiar non-existent domain error messages, but you will then be taken to the NSLOOKUP prompt (the > sign). From there you can enter various NSLOOKUP commands. When you are done, you can use the EXIT command to return to the command prompt.
The other thing that you should notice about Figure B is the bottom portion of the output. Beneath the reference to production.com is a string of IP addresses. These are the IP addresses of all of the domain controllers within the domain. I should also point out that if multiple IP addresses are assigned to a single server then all of the server’s IP addresses will be displayed by NSLOOKUP.
The NSLOOKUP Shell
Now that I have shown you how to use the NSLOOKUP command to see the IP address or addresses associated with the domain, let’s do something a little bit more useful. One of the things that you can do with NSLOOKUP is to look up a specific type of DNS record. A good example of this is an MX record.
In case you aren’t yet familiar with all of the intricacies of DNS, the MX record points to the organization’s mail server. For example, suppose that someone wanted to send an E-mail message to you, one of the first things that their mail server would have to do is to resolve your domain’s IP address. However, a normal address resolution won’t usually work for this purpose. In Figure A, you saw that when I ran a DNS query against the brienposey.com domain, the domain resolved to the address 24.235.10.4. Keep in mind though, that this is the IP address of the server that hosts my Web site, not the address of my mail server. If someone wanted to send me an E-mail message their E-mail client would have to resolve the IP address of my domain’s mail server. This is where the MX record comes into play. The MX record is a record on a domain’s DNS server that specifies the IP address of the domain’s mail server.
As you can see, the MX record is rather important. Suppose however that your domain was having trouble receiving E-mail and you suspected that a DNS server issue was to blame. You could use NSLOOKUP to confirm that the domain does indeed have an MX record and that the MX record is pointed to the correct IP address.
Earlier I briefly mentioned that you could work within the NSLOOKUP shell. To troubleshoot an MX record problem, you pretty much have to work within this shell. Therefore, you would start the process by entering the NSLOOKUP command at the command prompt.
Once the NSLOOKUP shell is open, you will need to tell NSLOOKUP which DNS server you want to query. To do so, enter the SERVER command, followed by the DNS server’s IP address. You can also enter the server’s fully qualified domain name (assuming that it can be resolved) as an alternative to the server’s IP address.
Now that you have specified a DNS server for NSLOOKUP to use, you can query domains without receiving the non-existent domain error messages that you saw earlier (as long as you remain within the NSLOOKUP shell). To do so, you would simply type the domain name that you want to query. For example, if you look at Figure C, you can see where I have specified a particular DNS server and then queried an external and an internal domain.
Figure C: The error messages go away if you specify a DNS server

Now, let’s get back to the business of looking up a domain’s MX record. To do so, you need to issue a command that tells NSLOOKUP to query based on MX records. The command that you will have to use is:
SET QUERY=MX
Issuing this command by itself won’t give you any information about the domain’s MX record though. For that you have to actually query the domain by entering the domain name. If you look at Figure D, you will see that I have specified an MX query and then entered the production.com domain name. NSLOOKUP now returns a wealth of information pertaining to my domain’s MX record.
Figure D: When an MX query is specified, you can get a wealth of information about your domain’s MX record

Conclusion
As you can see, NSLOOKUP can provide you with a wealth of DNS server diagnostic information. However, NSLOOKUP is not limited to providing the types of information that I have discussed. The NSLOOKUP shell is actually a fairly rich interface with a rather large command set. You can view a list of the available commands and their syntax by entering a question mark at the NSLOOKUP prompt (note: you can not use NSLOOKUP /? to view the command set).

Monitoring and Troubleshooting Using Event Logs
| This article reviews best practices for working with Windows event logs including how to interpret event messages, how to configure event logs, how to search and filter events, how to view events on remote systems, and how to use EventCombMT.exe and other tools to monitor events on multiple systems. | |
|
Figure 1: Example of an event.

Finding More Information About an Event
If an event contains a link and you click on it, a dialog box opens warning you that information about the event will be sent to Microsoft to see if they have more information available concerning the event:
Figure 2: Sending event information to Microsoft.

Clicking Yes opens the Help and Support Center and checks to see if there is any more information about the event that may be helpful. Figure 3 shows a typical response:
Figure 3: Additional help concerning the event.

How many times have you been frustrated by the lack of helpful information available this way concerning some obscure event? In the example above, the additional help provided is that “this error could be caused by either a high load on the domain controller or the failure of other domain controller services” and the suggested remedy is to “restart the DNS Server service” and check the event log for anything else that happened at the same time and could be a clue. In other words, its like the old mantra “when all else fails, try rebooting.” Where can you find more help?
Altair Technologies maintains a helpful site called EventID.net where users can search for additional information about obscure Windows events to help you interpret them. This site is community-based, meaning that users post their comments concerning events to create a community database that can then be searched by others. If you search EventID.net for information about the above event (source = DNS, event ID = 4004) the following is displayed:
Figure 4: Searching EventID.net for more information about event ID 4004 for DNS.

The really useful feature is under Details, where you can click the link “Comments and links for event id 4004 from source DNS” to see comments posted by other users:
Figure 5: Comments on event ID 4004 for DNS posted by users of EventID.net

The last comment is particularly useful as it indicates MS is aware of why this event occurs and suggests it can usually be safely ignored. Help and Support never told us that!
Configuring Event Logs
One of the first things you should do after you install a new Windows system is configure the event logs on that system. This is particularly important for servers where event logs can provide critical information to help you troubleshoot when things go wrong. Before we look at how to configure event logs, we need some background information on the different logs available, and Table 1 provides this below:
| Event log | Log file | Function | Availability |
| Application log | AppEvent.evt | Records events as determined by each software vendor | All Windows systems |
| Security log | SecEvent.evt | Records events based on how audit policy is configured | All Windows systems |
| System log | SysEvent.evt | Records events for Windows operating system components | All Windows systems |
| Directory Service log | NTDS.evt | Records events for Active Directory | Domain controllers only |
| DNS Server log | DnsEvent.evt | Records events for DNS servers and name resolution | DNS servers only |
| File Replication Service log | NtFrs.evt | Records events for domain controller replication | Domain controllers only |
Table 1: Summary of Windows event logs
By default all event logs are:
- Stored in the %Windir%\system32\config folder
- Have a maximum size of 16 MB (Windows Server 2003) or 512 KB (Windows 2000/XP)
- Overwrite events more than 7 days old
Figure 6: Default configuration of DNS Server event log on a Windows Server 2003 DNS server.

Before you put your new Windows server into production, you should decide if these default settings are appropriate. Suggested best practices for configuring event logs on servers include the following:
- Increase the size of each event log to at least 50 MB. Since a typical event is about half a kilobyte in size, this means you’ll be able to store 100,000 events in each log. Note that the maximum supported size of each event log is about 300 MB. If your system drive has insufficient space for your event logs, you can move them to a separate volume by editing the subkey for each log under the HKLM\SYSTEM\CurrentControlSet\Services\Eventlog using Registry Editor, see Microsoft Knowledge Base article 315417 for more information.
- Change the overwrite behavior for the Security log to Do Not Overwrite Events if your enterprise is a high security environment. That way if the Security log fills up the system will shut down to ensure that no events in the Security log are lost. If you do this, make sure you also archive and then clear your Security log regularly to prevent such a shutdown from occurring unexpectedly.
- Change the overwrite behavior for the other event logs to Overwrite Events As Needed so that no overwriting occurs until the entire log becomes full. Again, be sure to regularly archive and clear your event logs to prevent the log from filling up and losing events because of overwrites.
If you have a number of computers and are running Active Directory on your network, you can also use Group Policy to configure event log settings. These settings are found under Computer Configuration/Windows Settings/Security Settings/Event Log in Group Policy Object Editor:
Figure 7: Group Policy settings for configuring event logs.

Searching and Filtering Events
While scrolling through the Event console lets you easily examine the most recent events that have been logged on your system, this quickly becomes impractical on busy systems where event logs are tens of megabytes in size. If you’re looking for instances of a particular kind of event however, you can use the Find and Filter options to speed things up.
Say you want to find all instances of Event ID 4004 in the DNS Server log as shown previously in Figure 1 above. To use the Find feature to accomplish this, right-click on the DNS Server log and select View --> Find, then fill in the Event ID and log name in the Find box:
Figure 8: Finding instances of Event ID 4004 in the DNS Server log.

Click the Find Next button and the first instances of this event is displayed in Event Viewer:
Figure 9: An instance of Event ID 4004 displayed in Event Viewer.

Then click Find Next to display the next instance of this event, and so on.
The frustrating thing about this approach is that the Find interface is not built directly into the Event Viewer window. So let’s try a different approach and use Filter instead. Right-click the DNS Server log again and select View --> Filter, then fill in the Event ID in the Filter tab of the DNS Server Properties sheet:
Figure 10: Filtering the DNS Server log for Event ID 4004.

Click OK and Event Viewer and the only events displayed in the DNS Server log are those having Event ID 4004:
Figure 11: All instances of Event ID 4004 are displayed.

From this information we could conclude that this was only a transient problem that happened a couple of weeks ago when we rebooted the DNS server.
Viewing Events on Remote Systems
Event Viewer also lets you connect to remote systems to view their event logs. The procedure is simple: right-click on the root (top) node in the console tree of Event Viewer and select Connect To Another Computer:
Figure 12: Connecting to a remote computer to view its event logs.

Then either type the name (NetBIOS or FQDN) of the remote computer or click Browse to find it in Active Directory. Click OK to connect:
Figure 13: Can’t connect to a remote computer to view event logs.

Oops, can’t connect! And the error message is cryptic. What went wrong? Typically this error message either indicates one of the following:
- You are not logged on with an account that has local Administrator access to the remote machine (a Domain Admins account should work).
- The Remote Registry service is not running or has been disabled on the remote machine.
Correct the situation and you should be able to connect to the remote machine and view its event logs.
Using EventCombMT.exe
In a previous article on WindowsSecurity.com we looked at the Account Lockout and Management Tools (ALTools.exe) download from Microsoft. One of these tools is EventCombMT.exe, which can be used to consolidate event logs from multiple computers into a single location for analysis. To use this tool double-click on EventCombMT.exe in the folder where you installed it, then specify the domain, servers, and kinds of events you want to find. For example, say you want to find all W32Time events on two servers (TEST230 and TEST235) in the testtwo.local domain:
Figure 14: Using EventCombMT to search for W32Time events on two servers.

Click Search and when the operation is finished a folder will open up displaying the results files generated:
Figure 15: Results files generated by our EventCombMT search.

Double-clicking on one of the two server files displays a comma-delimited list of W32Time events for that server:
Figure 16: Comma-delimited list of W32Time events on server TEST230.

You could then import these files into Excel to consolidate them for further analysis. EventCombMT also has a number of built-in queries you can use for common tasks like searching for locked-out accounts:
Figure 17: Searching for locked-out accounts using EventCombMT.

Where You At? Ask Your Phone, Not Your Friend
 GPS is taking off, as phone makers, carriers, and service providers have realized that consumers generally have no idea where they are, ever. A location-based service (LBS) takes raw GPS data that pinpoints your location and enhances this information with additional services, from suggesting nearby restaurants to specifying the whereabouts of your friends.
What is it? LBS was originally envisioned as simply using old-school cell-phone signal triangulation to locate users' whereabouts, but as the chips become more common and more sophisticated, GPS is proving to be not only handy and accurate but also the basis for new services. Many startups have formed around location-based services. Want a date? Never mind who's compatible; who's nearby? MeetMoi can find them. Need to get a dozen people all in one place? Both Whrrl and uLocate's Buddy Beacon tell you where your friends are in real time.
Of course, not everyone is thrilled about LBS: Worries about surreptitious tracking or stalking are commonplace, as is the possibility of a flood of spam messages being delivered to your phone.
When is it coming? LBS is growing fast. The only thing holding it back is the slow uptake of GPS-enabled phones (and carriers' steep fees to activate the function). But with iPhones selling like Ben & Jerry's in July, that's not much of a hurdle to overcome. Expect to see massive adoption of these technologies in 2009 and 2010.
Wednesday, October 20, 2010
64-Bit Computing Allows for More RAM
In 1986, Intel introduced its first 32-bit CPU. It wasn't until 1993 that the first fully 32-bit Windows OS--Windows NT 3.1--followed, officially ending the 16-bit era. Now 64-bit processors have become the norm in desktops and notebooks, though Microsoft still won't commit to an all-64-bit Windows. But it can't live in the 32-bit world forever.
What is it? 64-bit versions of Windows have been around since Windows XP, and 64-bit CPUs have been with us even longer. In fact, virtually every computer sold today has a 64-bit processor under the hood. At some point Microsoft will have to jettison 32-bit altogether, as it did with 16-bit when it launched Windows NT, if it wants to induce consumers (and third-party hardware and software developers) to upgrade. That isn't likely with Windows 7: The upcoming OS is already being demoed in 32-bit and 64-bit versions. But limitations in 32-bit's addressing structure will eventually force everyone's hand; it's already a problem for 32-bit Vista users, who have found that the OS won't access more than about 3GB of RAM because it simply doesn't have the bits to access additional memory.
When is it coming? Expect to see the shift toward 64-bit accelerate with Windows 7; Microsoft will likely switch over to 64-bit exclusively with Windows 8. That'll be 2013 at the earliest. Meanwhile, Mac OS X Leopard is already 64-bit, and some hardware manufacturers are currently trying to transition customers to 64-bit versions of Windows (Samsung says it will push its entire PC line to 64-bit in early 2009). And what about 128-bit computing, which would represent the next big jump? Let's tackle one sea change at a time--and prepare for that move around 2025.
Shut Down Unwanted Processes With Process
Like most Windows users, I have a love/hate relationship with the OS's Task Manager. When it works to kill an application or a process that's slowing down my PC, I love it. But when the Task Manager doesn't work (something that happens all too often), or when it simply works too slowly, well, you know how I feel. Enter SoftwareOK's ProcessKO (free): this teeny-tiny utility lets you knock out processes simply by clicking a button. But PC newbies take note: ProcessKO is not for you.
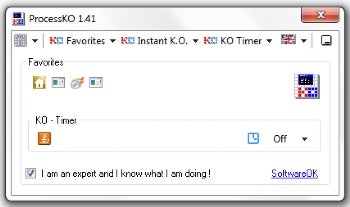 Once you've designated a process as a favorite, you can terminate it simply by clicking on its icon.
ProcessKO resides in a small (43KB) executable file that you run whenever you'd like to use it--no installation required. It offers three main options for managing your PC's processes: Favorites, Instant K.O., and KO Timer. Instant K.O. works the most like your Windows Task Manager, albeit much more quickly. Clicking on this option instantly brings up a list of all of your PC's running process; you simply scroll down the list and highlight the one you'd like to terminate. I tested ProcessKO on two systems: a Dell laptop and a Dell desktop, both of which run Windows 7. The desktop usually runs without any problems, though I do notice that my Google toolbar sometimes slows down Internet Explorer. I was able to use ProcessKO to terminate the toolbar's process--and sometimes the IE process--to prevent my PC from stalling. My laptop often has problems with iTunes, which can stall and freeze the entire PC, so I was able to use ProcessKO to terminate iTunes before the deep freeze set in.
KO Timer lets you select which processes you'd like to terminate on a schedule you set, while Favorites lets you add processes that you know you need to deal with regularly. Clicking this option brings up a list of your PC's processes, from which you can select those that you'd like to add as Favorites. Once you've designated a process as a Favorite, a small icon denoting it is added to the ProcessKO Windows. Note, though, that many of the processes (especially those pertaining to Windows' functions, as opposed to specific apps) appear with the same icon, and you can see the name of the process only by mousing over it. And, the name of the process is just what you'd see in the process list, so not only do you have to remember the difference between similar-looking process names such as sprtcmd.exe and sprtsvc.exe, you have to know which (if either) of these processes is safe to kill, if you've added both to the Favorites list.
You can kill a process simply by clicking its icon in the Favorites list, but ProcessKO doesn't offer the same kind of hand-holding that Windows does. Whereas the Windows Task manager will warn you that ending a process can result in lost data and an unstable system, ProcessKO simply makes sure you've accepted its "Expert Clause." You can't proceed until you've checked the box that says "I am an expert and I know what I am doing!" Any trouble that results, well, that's for you to deal with.
That's why PC novices should stay away from ProcessKO (and from terminating processes using Windows Task Manager in most situations, too). But PC power users will appreciate the speed and simplicity of ProcessKO, as well as the amount of control it gives them over their Windows system.
Should You Increase Your Page File Size In Windows For Better Performance?
With windows , the maximum virtual memory in 32-bit is capped at 4GB and the page file size at 16TB. In 64-bit Windows, virtual memory can be 16TB in size with a maximum page file size on 256TB.
Does this mean you need to stock up on gobs and gobs of HDD space for maximum performance? No, because RAM is faster than a hard drive is. It is far more desirable to have more stuff running in RAM than to be stored on a page file; this is the reason why the old adage of "max out your RAM" still holds true to this day.
This is, by the way, why it’s a good idea to go 64-bit. A 32-bit architecture supports a maximum 4GB physical RAM. That’s it. With 32-bit Windows you get "robbed" of almost a full GB of RAM even if you have 4GB physically installed due to what’s known now as a 3 GB barrier. With 64-bit you are currently only limited to what the motherboard can physically hold. Most new PCs today can physically hold 8GB RAM on the low end and 24GB on the high. More is better; that hasn’t changed.
Maxed-out RAM however doesn’t count for much if the hard drive isn’t up to the job concerning the paging file.
The paging file in Windows is stored on your hard drive. If you want to see the information on what Windows is using for space concerning that, do the following:
- Start button / Windows logo
- Run
- Type sysadm.cpl, click OK
- Click Advanced tab
- Under Performance click Settings button
- (From new window that pops up) Click Advanced tab
Under Virtual Memory you will see "Total paging file size for all drives: XXXX MB" where XXXX is the current number of MB used. This number is usually identical to the amount of physical RAM in your system.
Modifying The Page File Size – Should You Do It?
This depends on a few factors.
1. Do you intend to increase or decrease the size?
Decreasing the size is not recommended because it can potentially crash Windows. A lot. Why? Because you’ll go to run something, Windows will run out of virtual memory and… blue-screen.
Increasing the size is OK if your hard drive is in decent condition. See next point.
2. Is your hard drive in decent condition?
"Decent condition" defined: A hard drive under 5 years old that has not gone through super-heavy usage.
The page file in Windows is large by nature, changes often, fragments here and there and so on. An increased page file is best used on a hard drive that can take the punishment, so to speak.
Older HDDs on the other hand are best described as "tired"; a larger page file set may cause Windows to crash. On older HDDs it’s best to keep the page file setting to automatic, i.e. "System Controlled."
3. Do you have the HDD space to dedicate for virtual memory space?
The general rule of thumb is that if you want to increase your page file size, it should be double the amount of physical RAM currently installed in your system as a minimum, and double that as a maximum – if you have the space to spare. If not, don’t do it because that’s blue-screen city.
Example:
If you have 2GB RAM, new page file minimum size is 4GB, maximum 8GB.
If you have 4GB RAM, new page file minimum size is 8GB, maximum 16GB.
4. Do you need to?
This is the most important of the questions to answer.
Most people never have to modify the Windows page file because they simply don’t have any real need to do so. On my desktop PC, I always use the automatic method. However there are a few instances where I would modify it if I needed to:
High-End Gaming PC
If I were a hardcore gamer playing games that had massive requirements for pretty much.. well.. everything, yes I would bump up my page file. This would in turn make my high-end games run smoother and launch slightly faster. Maybe not by a large margin, but any advantage helps in gaming .
Home File Server
File servers do nothing but sit there and serve files, obviously. What happens however is that these are computers that stay on for weeks or months at a time unattended. Giving Windows more page file space allows me to reboot less because it will take a lot longer for Windows to run out of virtual memory – if ever.
If I had a box with Windows being used as a file server and it locked up every few weeks for apparently no reason at all, and I had already ruled out everything else that would cause it (such as brownout, wonky network connectivity, etc.), I would bump up the page file – but again only after ruling out everything else.
I should note that the chance of a Windows-based server lockup being due to a virtual memory file problem is slim at best. But if you’ve already troubleshot everything you can possibly think of, replaced RAM sticks with new and the problem is still there, bumping up the page file may fix it.
Bad RAM
In rare instances a RAM stick will go bad, and it will most likely be the case that only one out of a set doesn’t work. If for example there were two 1GB sticks, the bad one is taken out and then the box runs on 1 until replacements are acquired and installed. Were I placed in that situation I would bump up the page file to compensate for the fact my physical RAM is only half of what it normally is. This would be a temporary solution, and while it wouldn’t run nearly as well as with 2GB, it at least makes the computing experience tolerable until replacement memory was installed – after which I would set the page file setting back to where it was.
6 Ways To Hide Files
6 Ways To Hide Files
In the context of this article, the hiding of files covers in-plain-sight and not-in-plain-sight. You’ll understand what I mean by that as you read through this.
People have their reasons for wanting to hide certain files. Maybe you’re updating your résumé at work and want to keep it away from prying eyes. Maybe you have some super-secret plans for world domination. Maybe for reasons not meant to be spoken in polite company. I won’t ask.
There are many ways to hide files, but here are 6, each with an Effectiveness score of one to five stars (5 being best).
1. Renaming
A time-honored practice that is almost half-a-century old at this point. It works especially well when you change the file extension.
Old:

Renamed:
![]()
![]() Known Issues : Will have to periodically get into lengthy discussions why the Orthodox church has 51 books in the Old Testament while the Protestants only have 39. Other lengthy discussions may include the attempt of answering the oft asked question of why the New Testament was not named Old Testament Lite: 27-Book Edition.
Known Issues : Will have to periodically get into lengthy discussions why the Orthodox church has 51 books in the Old Testament while the Protestants only have 39. Other lengthy discussions may include the attempt of answering the oft asked question of why the New Testament was not named Old Testament Lite: 27-Book Edition.
2. Hiding The File
Right-click file, left click Properties, check Hidden:

![]() Known Issues: "Recently Opened" from the program you edited the file from will still open it right up. You will also forget where you put your file, and.. yeah, you can’t search for it either since it’s hidden.
Known Issues: "Recently Opened" from the program you edited the file from will still open it right up. You will also forget where you put your file, and.. yeah, you can’t search for it either since it’s hidden.
3. Password Protecting The File
When editing documents, any decent editor will have a save-with-password option.
![]() Known Issues: You will forget your password, or someone will guess it.
Known Issues: You will forget your password, or someone will guess it.
4. Emailing The File To Yourself, Deleting Inbox Copy, Keep "Sent" Folder Copy.
Amazingly, this is the last place anyone would look for a document you’re working on. This is a method best described as "security by obscurity."
![]() Known Issues: Not recommended for use on a corporate email account because Exchange admins go batsh*t insane any time anyone attaches a file to an email (and justifiably so since the end users keep sending viruses OVER AND OVER AND– you get the idea.)
Known Issues: Not recommended for use on a corporate email account because Exchange admins go batsh*t insane any time anyone attaches a file to an email (and justifiably so since the end users keep sending viruses OVER AND OVER AND– you get the idea.)
5. ZIP, RAR Or 7-Zip It With Password Protected Archive + File Encryption.
This method works very well and is very secure . Not only are the files in the archive under password protection, but also have an extra layer of security with encrypted filenames so a scan of the archive will not reveal what’s inside.
![]() Known Issues: This is yet another method not recommended for use at work. Archive files stick out like a sore thumb even when sitting on the hard drive not doing anything. At some point an IT Admin will raise an eyebrow or two at you – at which point you jump out a window in a caffeine-induced adrenalin rush from day-old coffee for a quick escape while screaming something about how you deserve a better parking spot, given your tenure at the company.
Known Issues: This is yet another method not recommended for use at work. Archive files stick out like a sore thumb even when sitting on the hard drive not doing anything. At some point an IT Admin will raise an eyebrow or two at you – at which point you jump out a window in a caffeine-induced adrenalin rush from day-old coffee for a quick escape while screaming something about how you deserve a better parking spot, given your tenure at the company.
6. COPY /B (hide archive file inside an image)
This is basically exactly like #1 above but with some added perks.
Step 1.
Make a directory in the root of C drive called DONOTLOOKHERE.
Step 2.
Get a JPG. Any JPG. Any one of these will do. We’ll assume the filename is chuck_norris.jpg. Copy this file to C:\DONOTLOOKHERE.
Step 3.
Archive the files you want to hide to a ZIP, RAR or 7-Zip file. We’ll assume the archive file you create is secret.7z.
Step 4.
Copy secret.7z to C:\DONOTLOOKHERE.
Step 5.
Open a Command Prompt and type the following:
CD C:\DONOTLOOKHERE
COPY /B secret.7z + chuck_norris.jpg chuck_norris.jpg
DEL secret.7z
ECHO I AM AWESOME
EXIT
Close the Command Prompt window.
Step 6.
There is no step 6; you’re done. The only file remaining in the directory is chuck_norris.jpg at this point.
On inspection of the folder, the only thing shown will be the awesomeness that is Chuck Norris:

You, however, can right-click Chuck’s face, select Open then Choose Program:

…and from there select 7-Zip File Manager or other archive program of your choice. After that the archive program will be available as a choice whenever you right-click a JPG, to where you can open it up and see what’s in the secret.7z file you copied in the image.
Using this in combination with #5 above is probably the most effective way to hide files there is on a hard drive.
![]() Known Issues: Suitable for small archives only. A small image with a huge filesize from the addition of a large archive sticks out too easily. Also, repeated viewings of Chuck Norris may cause the urge to buy the entire box set of Walker, Texas Ranger. If you experience this, try an image of MacGuyver instead. Or maybe The A-Team. But not ALF.
Known Issues: Suitable for small archives only. A small image with a huge filesize from the addition of a large archive sticks out too easily. Also, repeated viewings of Chuck Norris may cause the urge to buy the entire box set of Walker, Texas Ranger. If you experience this, try an image of MacGuyver instead. Or maybe The A-Team. But not ALF.
USB 3.0 Appearing On More Motherboards
USB 3.0 Appearing On More Motherboards
USB 3.0 is something you’ve heard a lot about but isn’t exactly in wide availability just yet concerning peripherals and devices. However, if you do plan on buying a new motherboard soon, you can purchase one that has USB 3.0 ports on it right now at a very nice price.
How to find motherboards with USB 3.0 ports on them:
- Go NewEgg’s motherboard category.
- Select from the left AMD or Intel, depending on your CPU maker of choice.
- On the next page click "Advanced Search" on the left sidebar.
- Scroll down until you see the "USB 3.0" drop-down menu. It’s suggested you purposely choose "2 x USB 3.0" because the largest selection of motherboards with USB 3.0 have 2 ports.
- Scroll down and click "Search."
- On the next page, click "Guided Search" on the left sidebar, then narrow your results from there (CPU Socket Type, CPU Type, etc), or alternatively just look at the results.
You’ll notice on the vast majority of motherboards available that they have both USB 2.0 and 3.0. Typically you will still get your 6 USB 2.0 ports with the addition of 2 USB 3.0. You’ll also notice it’s becoming much more of a common item, meaning you won’t have to shell out gobs of cash just to have integrated USB 3.0 on your motherboard.
How do you tell where the USB 3.0 ports are on the motherboard? That’s easy. USB 2.0 is black, USB 3.0 is blue:

Server virtualization
Server virtualization
The goal
Consolidate and save with IBM server virtualization technology
Save capital, floor space, and energy by consolidating multiple workloads onto fewer physical servers. The traditional server-per-workload paradigm ties up valuable capital, drains operational resources and is typically underutilized. IBM server virtualization technologies can help you achieve new efficiencies by reducing the number physical machines required, streamlining maintenance and management and laying the foundation for a more resilient, dynamic infrastructure.
The advantage
Deep experience with server virtualization
IBM offers a rich, diverse and integrated array of server virtualization technologies, System x(x86), Power Systems and System z(mainframe), as well as the services and software and other infrastructure elements to help you simplify and automate management of the computing environment. IBM’s virtualization experience is unequaled in the industry.
The benefits
Get more business value and lower total costs
IBM server virtualization technologies can help you:
- Better utilize new and existing servers to conserve capital
- Reclaim valuable floor space in the data center
- Reduce server energy consumption and cooling requirements
- Simplify maintenance and management tasks
- Improve reliability and availability to support higher service levels
Server virtualization drives up utilization rates and drives down costs, but it also helps you to achieve the flexibility you need to pursue competitive advantage. Whether this means simply cutting costs to support the bottom line, or reinvesting the savings to support new services and improve existing offerings.
Tuesday, October 19, 2010
Import .pst files
From MozillaZine Knowledge Base
Microsoft Outlook .pst files use a proprietary format. Thunderbird not only doesn't understand that format, it has no idea that .pst files even exist. Thats why there is no import command that lets you browse to the location of a .pst file.
Normally you import the contents of a .pst file by setting Outlook as the default email client, and then use Tools -> Import -> Mail within Thunderbird. Thats makes SimpleMAPI calls to Outlook, which returns the contents of the personal folders (.pst) file. See this article for information on how to import from more than identity. If some of the messages aren't imported correctly a common workaround is to import the messages into Outlook Express, and then import the messages from Outlook Express into Thunderbird.
If you are running Windows there are several mail conversion utilities that support importing .pst files. However, they actually make SimpleMAPI calls just like Thunderbird does. If you just have the .pst file (and can't install Outlook on the PC) you could:
- Install Thunderbird on another PC that has a compatible version of Outlook.
- Make Outlook the default email client.
- Copy the outlook.pst file to that PC and configure Outlook to use it. (may need to be in the default location)
- Compact the .pst file using Outlooks File -> Data File Management commands to permanently get rid of any deleted messages. Don't confuse this with compressing or zipping a file.
- Import the messages using Tools -> Import -> Mail. You can use Tools -> Import to also import the settings and address books.
- Repeat steps 3-5 as necessary for any other .pst files.
- Backup the Thunderbird profile. Mozbackup is a useful tool to do that.
- Restore the Thunderbird profile on your PC.
- Cleanup. (Uninstall Thunderbird on the PC with Outlook etc.)
- Alternatives:
- If it is not practical to backup and restore a profile (perhaps one PC is using Windows and the other OSX) you could move it instead.
- Alternatives:
- If you already created a new profile on your PC you could copy the profile from the other PC to it and then import its folders using either the ImportExportTools add-on (recommended) or the Local Folders add-on. That way you won't lose anything in your new profile.
What type/version of .pst file and what version of Outlook you are using matters. You normally can't open an Outlook 2003 .pst file (it defaults to Unicode) in Outlook 2002 (which only supports ANSI). You could export it as a Outlook 2002 compatible .pst file in Outlook 2003 using the File, New, Outlook Data File command, and then choose Outlook 97-2002 Personal Folders File (.pst) as the storage type.
Outlook doesn't care what the folders names are since it stores all of the folders within a .pst file. Thunderbird however stores all of the messages for each folder in a file named after the folder, so if you use characters in a folder name that are invalid filename characters it can cause problems. If you get an error message about Thunderbird being unable to create a folder you may need to rename all folders to use 7-bit alphabetical ASCII characters and try again. Another possibility is that you had two child folders with the same name under two different parent folders. Rename one of the child folders.
Thunderbird has no concept of Outlook identities or profiles so it only imports from the default identity or profile. If you have multiple identities or profiles you need to set one as the default, import it using Thunderbird, and then repeat.
Microsoft IE falls below 50 percent market share
Wednesday, 06 October 2010, 06:04 Hrs
Bangalore: Microsoft's Internet Explorer fell below 50 percent in September. IE's share dropped to 49.87 percent which certainly is a mile stone in the web browser wars.
Microsoft has been the powerhouse in the browser market since the company started bundling IE with Windows in order to compete with Navigator, a browser launched in 1994 by Netscape Communications. Since Microsoft provided the browser with their operating system, it became a single monopoly browser which eventually led to the downfall of Netscape.
Today, government regulators require Microsoft to create a level playing field for competing browsers in Windows. In Europe, European Commission competition authorities require Microsoft to provide a menu of browsers to give Windows users a choice.
The stiff requirements in Europe have contributed to IE's share falling to 40.26 percent in September from 46.44 percent a year ago. In North America, IE still accounts for more than half of the market at 52.3 percent, followed by Firefox at 27.21 percent and Chrome at 9.87 percent.
Net Applications, another Web metrics firm, has drawn other conclusions on the global browser market. The company this month reported that IE's share had fallen in September but still accounted for more than half the market at 59.65 percent.
A research firm found that the rising star in the browser market was Google's Chrome, which has tripled its share to 11.54 percent in September from 3.69 percent the same month a year ago. In June, Chrome overtook Apple Safari for the first time in the U.S. Mozilla Firefox holds the second largest market share with 31.5 percent.